Prepping for Deer Season: Our Hunting Checklist

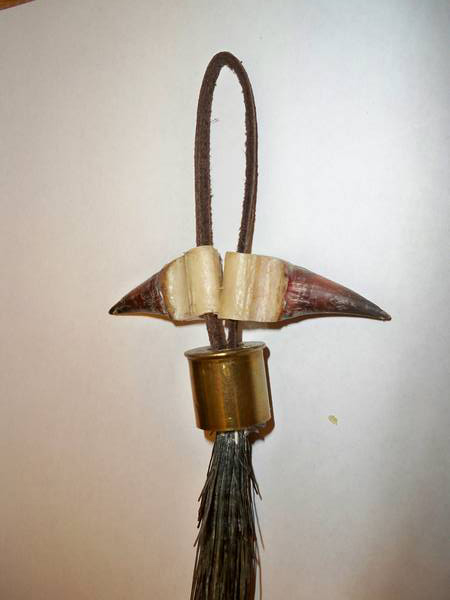
Thanks to our weekly turkey hunts, it seems that April has slipped into May with hardly any of us noticing. The only thing hinting that we are edging closer to summer is the melting snow and showers causing Idaho to become one giant mud puddle. We refuse to let that damper our moods however; particularly since turkey season here goes until the end of this month. However, even though it isn’t summer time here yet, we’ve already begun to think forward into fall. Why you ask? Well, 1. because during a few of our turkey hunts we’ve run across some pretty awesome sheds, and 2. because we (like many of you) like to get any new hunting equipment by May or June so that we have loads of time to break it in before the fall deer season begins. Therefore, we decided to examine what we feel are necessary items to help make sure you have a safe and happy hunt.

Making Your List

Now, there are several ways you can prepare for a hunt. You can use a list from a previous year (most seasoned hunters at this point have this down pat), you can ask a friend for advice if your newer to the hunting world, you can look to the internet for other people’s preferences (like this sweet list your reading now), or you can go online and find a pre-made check list like this one by Gander Mountain. We prefer not to use pre-made lists, because we found that often times the list includes too much and ends up forcing us to haul around unnecessary equipment that only bogs us down. Regardless of where you get your information though, we found most lists (ours included) have these items: A fully charged cell phone, flashlight, lighter, wooden matches, batteries, energy bars, water, a pee bottle, a compass, hunting knife, binoculars, gloves, rain gear, gloves, a hat, and rope. These items should be in every hunters pack along with their hunting license and tags. We aren’t going to explain why you need these items, because they are fairly self explanatory. Rather, we are going to focus on the other items we like to carry in our packs.

Tree Stands and Scent Eliminators

Whether you prefer to hunt using a tree stand, or hunt using ground cover, a scent eliminator is a necessity. There are hundreds of scent eliminators on the market, and picking the wrong one could cause you your hunt. We love recommendations from other hunters, but as of this moment we like the Scent-A-Way Max spray, though there are tons of ways to eliminate or mask your scent without having to buy a scent eliminator. Since most of us here like tree stands, we also always bring a small collapsible saw. There is nothing more infuriating that seeing a perfect spot, but being unable to set up the way you’d like due to branches. Also infuriating? Falling out of your tree stand because you either failed to bring a tree belt, or failed to put it on properly before you finish setting up in the tree; so don’t be that person: remember the belt. One of our good friends Jim Sullivan forgot his belt one year and fell out of his tree stand causing paralysis. Jim is now in a wheelchair, but still loves to hunt. So if you, or anyone you know, is disabled and still likes to hunt make sure to stop by Jim’s site Accessible Outdoors for tips, tricks and reviews for disabled hunters.

Calls and Lures

Once you’ve got the check-list for the tree stand done, you now get to move on to the fun stuff: calls, lures, and scents. Scents, we feel, are more of a personal preference. Some of us like using mass market scents, like HooDu Deer Attractant, some prefer to use urine, and some of us like using quirky (yet effective) home-made scents like vanilla extract, maple syrup, or peanut butter. No matter your preference, remembering to bring your attractant is key in ensuring a successful hunt. The importance of a good call is also something you never want to overlook; just make sure the call your using suits what you’re looking for. One of our staff swears by the Primos Hunting Speak Easy, while another one prefers the more traditional Extinguisher Deer Call. Regardless of your preference, we recommend you always bring two that way you have not only more options for calls, but a back-up in case one of your calls runs out of batteries or breaks.

Finally, the last few things we recommend are just personal preferences. We almost always make sure to take along some toasty toes and hot hands. Idaho whether can be fickle, and we dislike chilly extremities when it can be easily avoided. We also like to bring along surveyors tape because you never know when you might need to mark a path. Last, but not least, we bring our Pro-Tracker, ultimate tracking and recovery system. We know a lot of you might wonder why bringing a Pro-Tracker is necessary, but we can quickly and easily explain. We like bringing the system so on the off-chance our shot goes awry and isn’t a kill shot, we know we are very likely to find the wounded animal. We (of course) will try to follow the blood trail, but we’ve been on far too many hunts where the blood trail run cold or is lost due to inclement weather and we just hate the idea of not only losing a trophy, but leaving an animal wandering around with an injury that is our fault. By bringing the Pro-Tracker system, we can do our best to make sure that if our own personal tracking skills fail, that we still have a good chance of recovery. We hope you guys like our recommendations, and please leave us some recommendations of your own. What items do you swear by or rely on during your hunts?

Talkin’ Bout Turkey: Presenting and Preserving your Trophies

Here in Idaho, our spring turkey season ends later this month. We’ve had an awesome time hunting on weekends, and like many of you, we are admiring our trophies. Unfortunately, as many of you that have been hunting turkey for years have noticed, unless done properly after time your prized beards will begin to fall apart. Some of the beards we don’t mind letting go of, but some (like the beard from our very first tom) are ones we would like preserved for the sake of good memories. Luckily, we’ve found through trial and error (as well as hunting forums) some fool proof ways to help elongate the life of your beards so that they can remind you of memorable hunts for years to come.

Our Favorite Method

The most popular (and our personal favorite) way to not only preserve, but display, a beard involves borax, silicone, leather (or rawhide), and clear coat. First, you place your beard and spurs in Borax (or salt) until any fleshy leftovers are dry. Drying usually takes a few days, so you can get everything else ready while you prep your beard and spurs. For the second step, grab a shot gun shell of whatever size you prefer. Carefully separate the plastic and the shell, dump any pellets, and remove the primer. If you’ve also got the spurs, and have treated them with borax, spray them with clear coat. Once they are completely dry, you can run one on each end of the leather and you can also add in beads if you want this beard and spurs display to be extra fancy. Once this is done you have two options: you can simply hot glue each end your strip of leather or rawhide to the top of the shell, or for those of you who have a steady hand and a lot of patience, you can drill a small hole through the center of the shell, push each end of your leather strip through (making a loop) and knot it. Once knotted, we recommend running some hot glue around the knot to keep it secure. Once your beard is dried, stick the skin side into the shell and fill it with silicone (or if you don’t have that hot glue). Wait a day or two for this to become completely dry, and then spray the whole thing with clear coat. Once you’re finished, you should have something that looks like this:

Turkey Beard-Spurs

A Simpler Option

If that idea seems a bit too complex for your tastes, you also have the option of simply drying the beard in salt or borax, then wrapping the skin end in twine, leather or another preferred material and then dipping it into paraffin or bees wax. This will preserve it for some time, and as long as the beards are held in a place with fairly consistent temperatures they should last a few years. If you like the simplicity of this method, but want to ensure the beards will have a longer life; we recommend that you place them in a clear glass display case. The less the air and elements touch the beards, the longer they will be able to maintain their hairs. If you prefer to keep your beards, but don’t want to necessarily display them one sure fire way we’ve found to preserve them is to dry them in salt or borax, place them in a plastic container, and pop them in the freezer. This method, while effective, may cause concern for those unfamiliar with the importance of preserving a Tom’s trophy beard. Therefore, it is always good to make sure either A. your family is aware of the importance of said trophies and that their presence in the freezer needs to be overlooked, or B. that the beards are placed in a secondary freezer that is either used as a main freezer overflow, or for meat.

Fan Mount

Lastly, if you are lucky enough to not only get the beard and spurs, but to maintain the integrity of your bird’s tail feathers, you can make a fan mount. Fan mounts are a beautiful thing when done correctly, but they do take precision and time in order to make sure they look balanced. For this project you will need a mount (either one pre-cut with slots for the beard and spurs, or one that you alter on your own), small knife, borax or salt, hot glue, and a heck of a lot of patience. In order to make a fan mount, take your beard and spurs and place them in Borax or salt (like you would for any f the previous options). Remove the fan by cutting it off; make sure to take enough meat and bone to make sure that all feathers remain attached and to also give yourself some room to work. This next step is the one that is a doozy and requires methodical concentration to make sure it gets good results. Once you have the tail removed, you then need to go in with a small knife and follow the shafts and large tail feathers in order to remove any extra flesh as well as any smaller feathers. Once this is done, you will (surprise!) borax the ends of the fan. Once they are dried, you will now artfully arrange your feathers into a nice fan shape on your mount. Once you have achieved the desired shape, go back in and remove some of the shorter tail feathers (somewhere between 7-10 seems to be good); set these aside because you’ll likely want to use them later. Tack down the rest of the fan to the mount. Once is has dried completely, carefully arrange the smaller feathers you plucked out to cover the tips you glued down on the large fan. Once all glue spots are covered to your liking, lock the small feathers in place with small dabs of hot glue. Once the feathers are dried, you can place your beard and spurs across the remaining area or in the designated slots on your mount. If you want to ensure your hard work will look great for years to come, give it a quick coat of clear coat. The end result should look something like this:

mWX567XovhpoxxHJTLpcd0g

So, there you have all of the various ways we have found that do a good job at preserving, as well as presenting, your trophies from your turkeys. We hope you guys like them! Do you have a different way to preserve them? Then let us know!